How to Create & Scan Dynamic Wallet Passes Using AddToWallet
Step 1: Create a Dynamic Pass Template
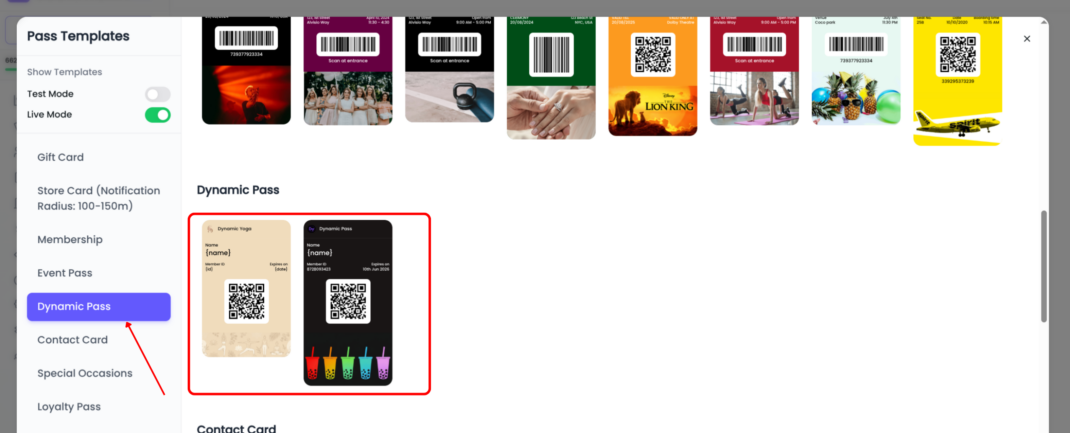
Navigate to Pass Templates and select a Dynamic Pass Template.
Dynamic Passes allow a single template to be connected to a user group, making it easy to manage and update passes for multiple users from one plac
Step 2: Add Dynamic Fields
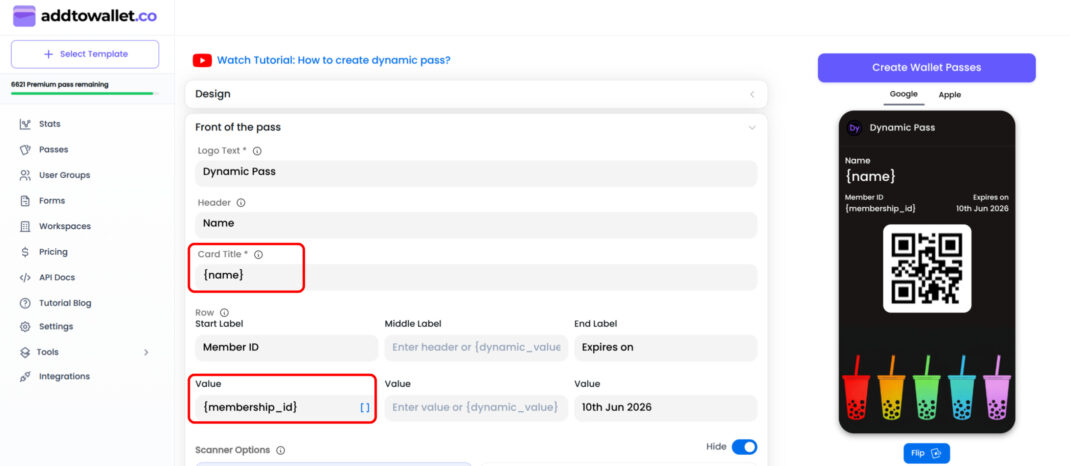
Dynamic fields allow content to change for each user while using the same template.
To create a dynamic field, wrap a field name inside curly braces.
Example
{name}{membership_id}
When a pass is generated, these placeholders are automatically replaced with each user's data.
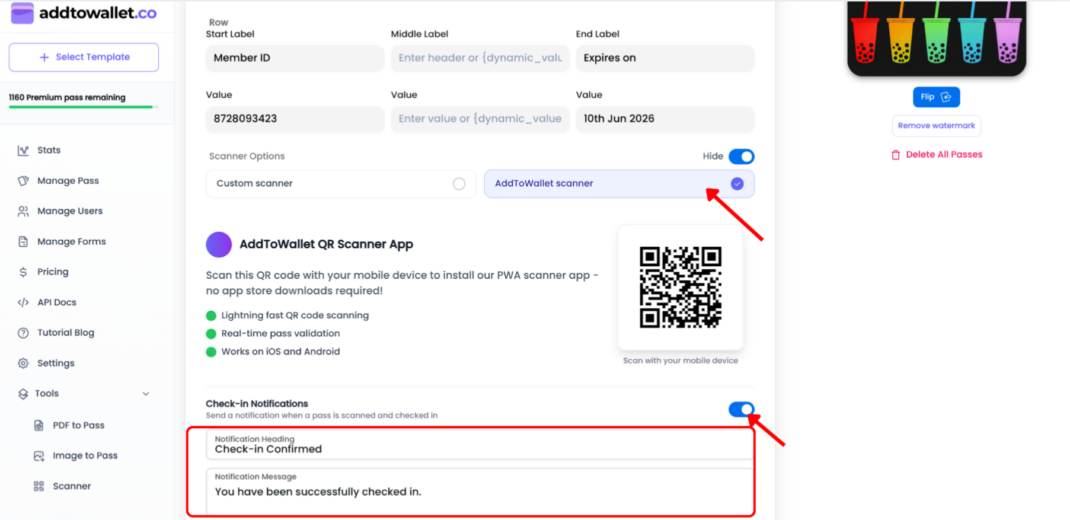
Step 3: Configure Check-In Settings
If you'd like to track attendance or usage, enable check-ins from the template settings.
Available Options
- Enable Check-In Notifications
- Customize notification messages
- Automatically expire passes after check-in
- Track check-in activity through logs
These settings work seamlessly with the AddToWallet Scanner app.
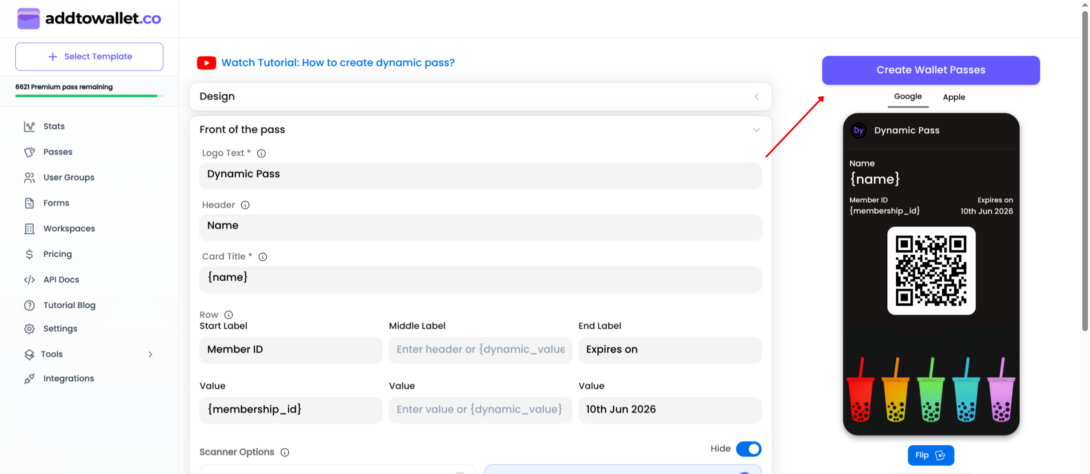
Step 4: Save Your Template
Once you've finished configuring your pass design and settings, click Create.
After the template is created, a user group is automatically attached to it and is ready to receive users.
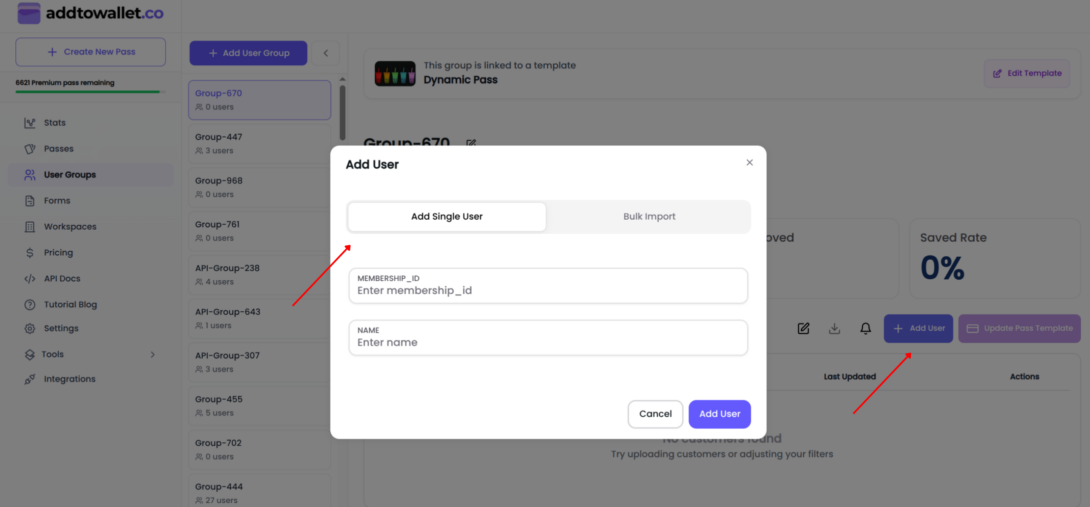
Step 5: Add Users to the Group
After creating your template, you'll notice that a user group has automatically been created and linked to it. This group is where you'll manage all users who receive passes from this template.
To add users, click Add User. You can either add users one at a time by entering their details manually or import multiple users at once using a CSV file. Every user added to the group will receive a personalized pass generated from your Dynamic Pass template.
Step 6: Import Users in Bulk
For large imports, download the CSV template provided by the group.
How It Works
- The downloaded CSV template contains columns that match the dynamic fields in your pass template.
- Each row represents a user.
- Fill in the relevant information for each user to personalize their pass.
Bulk Import Process
- Download the CSV template for your group.
- Populate the template with your user data.
- Upload the completed CSV file.
- AddToWallet automatically generates personalized passes for all users.

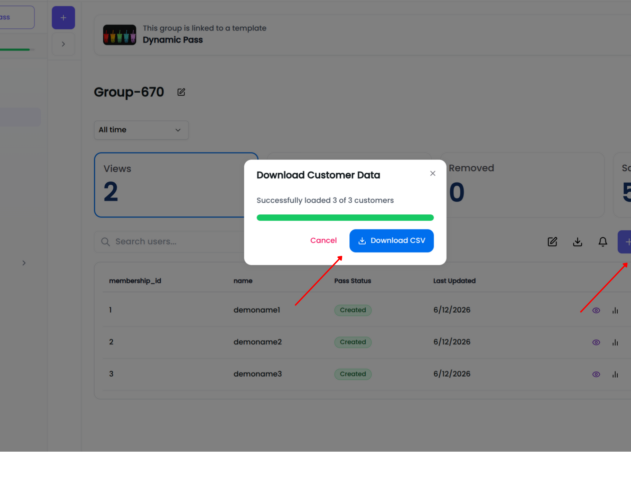
Step 7: Download Pass Links
Once passes have been created, you can download all pass links in a single file.
Simply click the Download button located at the top of the Users table.
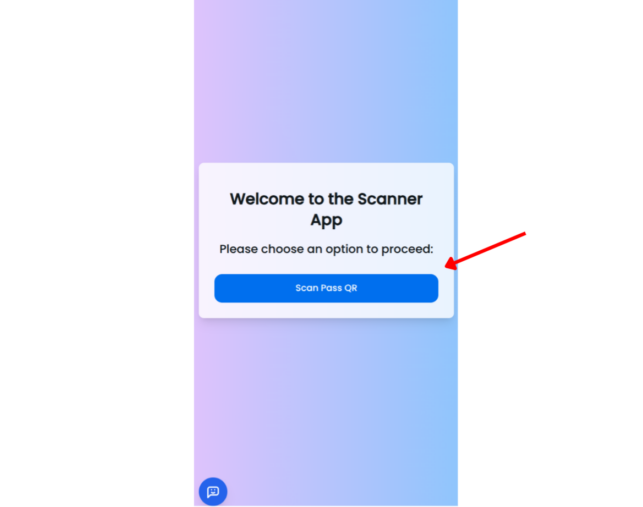
Step 8: Check In Users
To check in a user, open the AddToWallet Scanner App and scan the pass QR code or barcode.
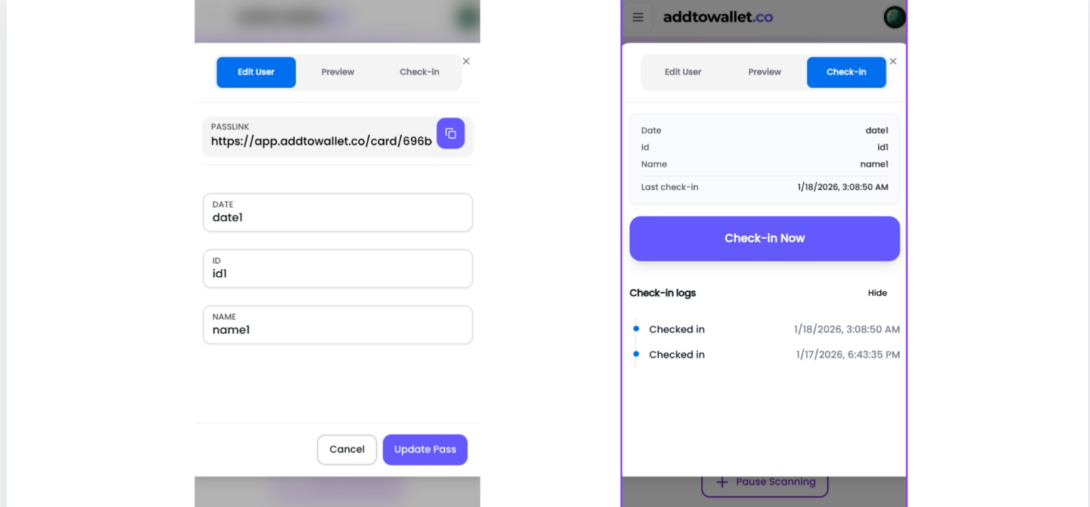
Important
Make sure you're logged into the same AddToWallet account that was used to create the pass.
Once scanned, the check-in will be recorded automatically.
Conclusion
Dynamic Passes make it easy to manage large numbers of Apple Wallet and Google Wallet passes without creating or updating them individually.
By combining dynamic fields, bulk imports, automatic user groups, and check-in tracking, you can build scalable membership cards, loyalty programs, event tickets, employee badges, and more all from a single template.
Ready to get started? Create your first Dynamic Pass and start managing thousands of personalized wallet passes with ease.
Get Started For Free
Join the expanding network of more than 10k+ users
No credit card needed to start trial
addtowallet.co © All Rights Reserved